My blog has moved!
You should be automatically redirected in 5 seconds. If not, visit redirectLink" href='http://chateauandbungalow.wordpress.com/'> http://chateauandbungalow.wordpress.com and update your bookmarks.


Showing posts with label d.i.y.. Show all posts

Monday, April 18, 2011

Green Apple & Pink Flower Arrangements

I happened to come across the May issue of Woman's Day magazine at the hairdresser on Friday and was just so drawn to the cover. It's not a magazine I usually read, but the combination of the granny smith apples and pink ranunculus was just so charming and pretty. I also have an affinity for pink and green. And it would be super easy to do yourself. With Easter just days away, I'm thinking of giving it a shot.
Photo: Occasional World
I also love this version of it with peonies (my all time favorite flower!). Look at how grand of a statement you can make with a dozen flowers and two dozen apples. These would be a very affordable DIY wedding flower arrangement.
Photo: Red Pearl Designs
And for a simpler version, just add some tea roses.
There are few things that make me happier than a beautiful, fresh flower arrangement.

Monday, March 28, 2011

Kids Birthday Party

On Saturday, my daughter Carolina had a joint birthday party with her best friend for their 2nd birthday. They are nine days apart so it was perfect. It was also perfect that her friend's mother shares my neurosis for details which I knew in advance, but which really came to light when the two of us were testing every pen in Michael's Craft Store trying to get just the right color ink to match the invitations I had designed (using a free graphic design program called Inkscape). I knew I had found someone I could really work with! We went with a simple theme of pink and purple as my daughter is always in pink and her's is in purple, and we threw in a little green to tie things together where we needed to.
Of course, I had to make tissue paper pom poms (well actually, the pink and green ones were the same as the ones I used last year that now hang in my daughter's room when party time is over) to hide my hideous ceiling fans and add a little ambiance. This was the first time I made them with a patterned paper and I think the floral ones actually came out really cute.
The table screamed spring! I love having my daughter's birthday in the spring. There is so much appropriate decor out there to incorporate into a little girl's party this time of year. And at the last minute we decided to use some cute mini cupcake wrappers as individual ketchup servings for the kids which really added a great visual element to our serving platters too.
There are few things I love more than a good monogram! I came up with this one using the first initial of each of the girls' names, and had originally planned to use it on the invite, but at the last minute before going to print realized that we were doing it for us and it didn't really scream 2 year old so I did a quick change with a cupcake. But we had to get it in somewhere so we made it into cupcake picks...
and put a 2 on the opposite side. Of course we had to have pink and purple cupcake wrappers and pink and purple sprinkles to match. And I am now obsessed with having the proper tools to frost and decorate cakes and cupcakes. The Wilton Cupcake Decorating Set provides four tips, icing bags, and directions (if you are so inclined to read such things) on how to do different styles so you can create more professional looking sweets on your own. Go get one if you ever frost your own baked goods.

Displaying the 5 dozen cupcakes on different serving pieces of various shapes and heights made for a more interesting visual display.
A little garden of Peep pops (lollipop stick inserted into Peep-couldn't be easier) just for fun.

And for the favors, we found pink and purple tins that we filled with giblets, wrapped in green grosgrain, and sealed with our monogram label. None of these things were particularly difficult to do. In fact on a scale of 1 to 10 with 10 being the hardest, I'd put them at about a 4. With a little creativity and a few extra dollars (but not many), you can create a truly customized kids birthday party with a big impact without blowing the budget.

Friday, January 28, 2011

D.I.Y. Lampshades With the Lampshade Lady

I keep thinking that I'm going to make my own lampshade for a dining room project I've had on the brain for some time now, but I hadn't quite figured out how to do it. Well, I have no excuse anymore. Lampshade Lady Judy Lake of Lake's Lamps in Pawlet, VT has come out with a new book called "The Lampshade Lady's Guide to Lighting up Your Life", making it easy to create your own masterpiece. But what's even better is that you can get many of her tutorials for free online. Last week, the Hartford Courant ran a step by step guide to making your own drum shade courtesy of the Lampshade Lady. Lake's own blog also features many tutorials and she offers in shop classes as well. But if you aren't the D.I.Y. type, Lake can also custom make lampshades for you using your own cotton or linen fabric or postcards. She can even make shades out of sentimental items such as a favorite shirt or your grandmother's scarf. If you are in Vermont, you may want to stop by and pick out your own fabric and trims from the many options she has to offer in her store. The possibilities are endless!

Friday, December 31, 2010

18th Century Colonial Renovation: Move In Day!

I can't think of a better way to end the year than with being able to answer the most commonly asked question of the year, "Have Meg & Kurt moved into their new house yet?" with a resounding "YES!". The movers came on Wednesdsay and while there is still a lot of unpacking and a few final items to take care of, they are very happily in their new house after over 14 months of renovations. Before we go too far, you might want to take a peak at the beginning of this 18th Century Colonial Renovation to refresh your memory on what it looked like in the "before" pictures.
The most dramatic changes on the front were the removal of the front porch and the addition of a double sided staircase as well as new Hardiplank clapboard.
The sides and back of the house have been re-shingled and the trim has been painted to coordinate with the front of the house.
In addition to the new shingles, the back of the house got a new 8' sliding door and mahogany decking at both entrances.
Here is glimpse up the very narrow back staircase by the kitchen which received a fresh coat of paint on the walls and stairs. I always love a second staircase in a house. I don't know why they don't do that more often in new homes.
Before I go too far, I need to mention that I went in to take pictures the day before they moved in so there were still a few work related things laying around like a dry vac and garbage can in the middle of the kitchen. The kitchen was the one room that received new flooring. The cabinets are Abstrakt by Ikea.
All new appliances went into the kitchen and there are some nice little features like the pot filler over the stove. The one thing that still needs to be decided on here is a backsplash.
There used to be a chimney in this space, but as it wasn't necessary, they removed it and were able to add this custom built in bar and entertainment unit between the kitchen and den.
This room was considered the dining room, but they will be using it as a den as it is open to the kitchen. The new slider is the biggest addition to this room. You can see in the corner of the room and on the ceilings that there are exposed beams. The one in the corner was partially damaged and needed repair, but they were able to cover up that area with a nice box molding that doesn't look out of place.
The living room/dining area has a new wood stove and under that furniture cover is a wonderful gate-leg table that fits nicely along the wall when not in use and can be pulled out to the center of the room when entertaining more formally. While you can't see it in these pictures, the upper part of the walls are covered in beautiful grasscloth wallpaper by Elitist.
The rooms are filled with natural light which makes them so open and bright.
The front entry and stairwell were painted as well as the floors and staircase. Unfortunately, the old floors here were in too much disrepair to refinish, but I love the look of painted floors.

The stairwell from upstairs.
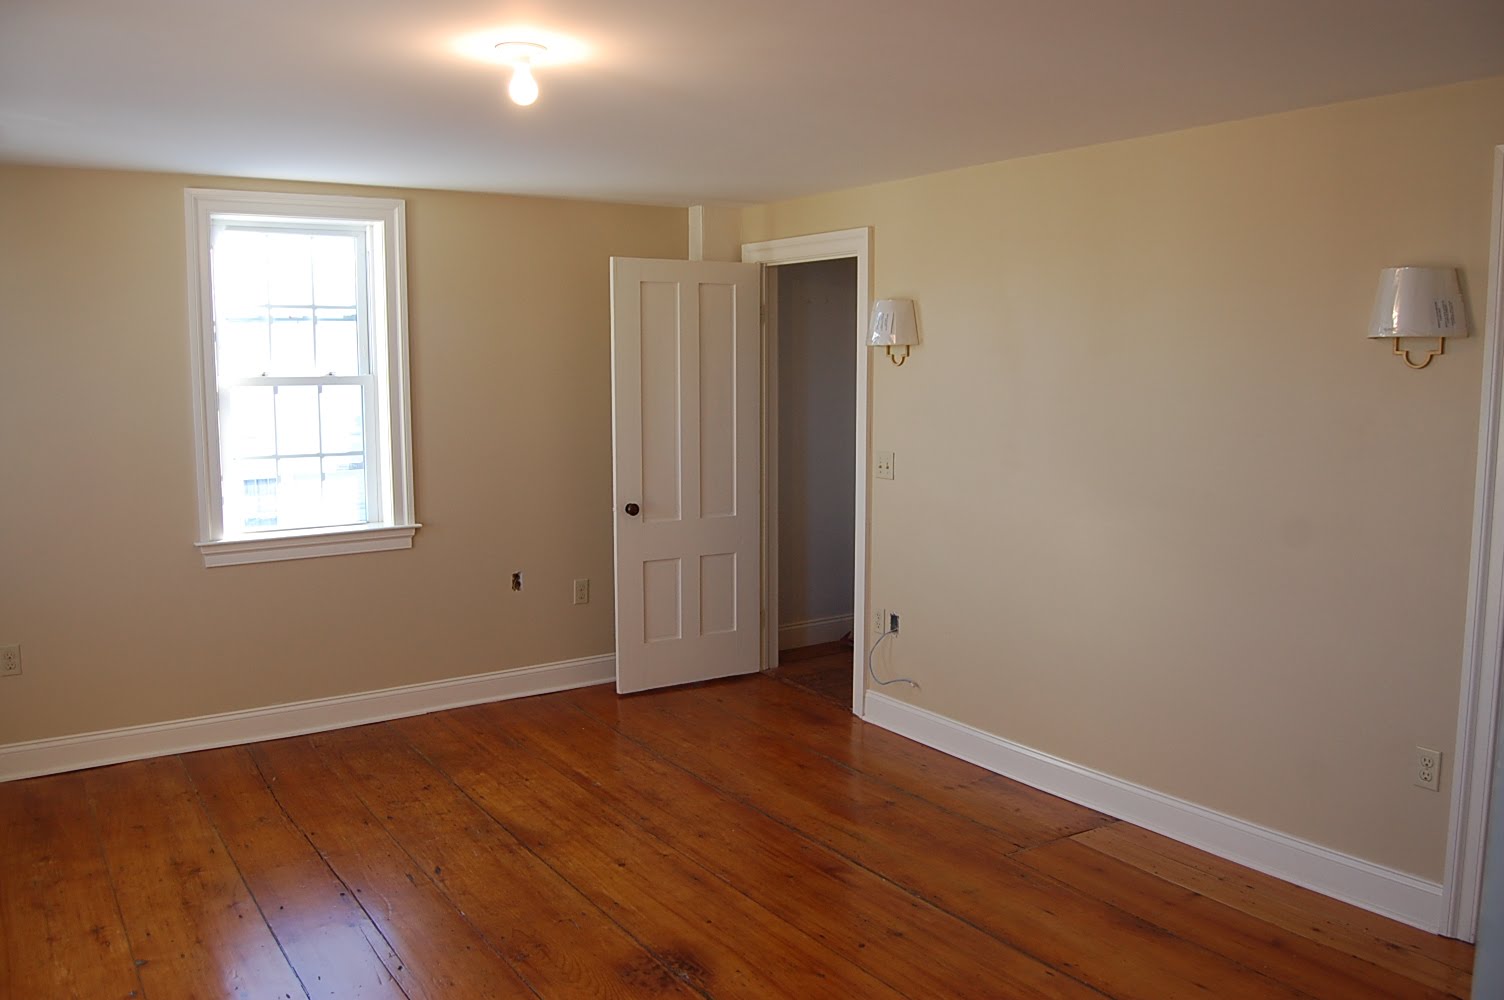
The master bedroom is enormous and very bright.
A new master bath was added off of the master bedroom. The upstairs had only 1 half bath before the renovation, but now has two full baths as well as a full bath downstairs.
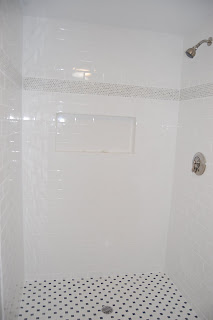
The master bath shower. This proved to be the most challenging of their DIY projects, particularly in getting the tile floor level with the drain, but it came out really nice. The glass enclosure has not been installed yet, but will be soon.
The long hallway was once part of each of the bedrooms so that one had to pass through one room to get to the next one. The color is one of my favorites-it's in my own living room too-Ocean Air by Benjamin Moore, although it looks quite different in this space because there is only one window in the hallway.
The guest/kids bathroom is spacious and soothing. Again, the floors were painted in this space.
An antique vanity adds some more character to the space.
This is the third bedroom. I actually didn't get pictures of the second bedroom because the final coat of paint was being added later on the day I was there. This room fits a twin bed, and I love the melon color.
While this room is on the smaller side, it is cozy and quiet and a spot one might retreat to for some down time.
On the third floor, the original beams and closet remain with their dark wood, but the floors and walls have all been painted Super White by Benjamin Moore.
I LOVE this! I have always wanted an all white room. This will be an office space and is the one room in the house with clear views to Newport harbor. I also love how they had built in drawers added into the walls to maximize storage space.

So there is the grand tour! I'm sure we will have many more projects from this house to share as finishing touches are made on the decor and things get unpacked. I know this is making for a very happy New Year for this family.

I am so excited about what's to come in 2011. Just a few of things I'll be bringing you include a fabulous wedding I'm planning in June, several projects around my own house, a Chateau & Bungalow product line and perhaps the revival of another fabulous product line as well as all the other great things I come across in my travels.

I wish you all a very Happy New Year too and thank you for following me!

~Sarah

Monday, November 8, 2010

Vintage Scarf Decor

I've always loved using objects in ways other than for what they are meant. I was perusing Vivre this afternoon and found this fabulous use of vintage scarves by Chanel and Yves Saint Laurent on a chandelier and some chairs by Susan Fellman, and I think this is a perfect combination of fashion and home decor as well as art and functionality. The chair uses three different vintage scarves and each of the pieces is made to order so no two are alike.

Not surprisingly, the prices on these pieces are steep. But if you have scarves that you aren't wearing but still love or are looking for a new piece of art, think outside the box. Frame one, have it turned into a pillow or bring it to your local upholsterer. I love the thought of a bedroom or vanity chair, even if just the seat, being upholstered with a beautiful feminine scarf.

Wednesday, October 6, 2010

Brightening Up Beige

The folks over at Ohdeedoh, Apartment Therapy's kids blog, always have great posts of people's before & after's in their homes. I came across this nursery this week, and was very impressed. On the surface, it looks like a cute well designed nursery, but what's so impressive about it is that upon a closer look, you can see that it is a room with beige painted walls and beige carpet. This is a rental that looks like anything but! So many people get stumped by what to do with a rental and how to infuse their own personality into them. Here, the homeowner put a bright colorful area rug over the beige wall to wall carpet, and added a scalloped wallpaper border that she made from contact paper. To find out how, you can check her blog, IS*LY. While this was done for a child's room, you can easily use these ideas for an adult's room too. So go on, and brighten up those beige rentals.

Tuesday, August 10, 2010

DIY Headboard and Duvet

My latest project has been a new headboard for our master bedroom. I'd been looking for fabric for a while and when I found this turquoise starfish print on linen back in March, I knew it was the one. So I bought it and the solid turquoise fabric to pipe it in and then proceeded to let it sit in a closet for 4 months constantly thinking that I would get to it just as soon as I had a spare moment. Then as if she were a gift from heaven, my most fabulous aunt Juanita who loves to have a project and is a wonderful perfectionist stopped by to borrow my sewing machine and asked me what projects I had done since she had last been over. So I showed her the family photo gallery wall and the kitchen message center and pulled out the fabric and told her my plan. The next day she called and offered to help if I wanted her to. Hmmm, let me think...yes!!!!

We were winging it a bit, but you can learn from our mistakes. We used a solid wood six panel door that my dog had scratched the heck out of (there may or may not be a door on our downstairs bathroom at the moment) as our base. We inserted foam into the area where the panels were to prevent and divets, and then wrapped the door with a queen size piece of quilter's batting. We attached everything with a staple gun except the foam which we taped down with industrial tape. Unfortunately, it didn't give us quite the thickness we were hoping for so we added a bit more batting and then wrapped it again with a few old towels to give it more thickness. That was perfect.

Next we laid out the fabric on the door, centered it where we wanted it and cut it to size with an additional 1/2 inch on the top and sides for seems and about 3 inches on the bottom so that we could wrap the fabric around the bottom and fasten it with staples to the back. Note that I bought railroaded fabric (which can be run either way without the pattern looking sideways) so that I wouldn't have to have seems on the front of the headboard. I bought 1 3/4 yards which was cutting it pretty close so buy 2 yards if you can just to be on the safe side.
We also cut 3 strips of the starfish fabric to about the depth of the headboard plus 4-6". One was the length of the headboard, and 2 the height of the headboard, and we sewed them together so that the seems would fall in the top corners of the headboard and it would appear slip covered. Then we sewed the front piece, turquoise piping and strip of fabric that would cover the depth of the headboard all together. We flipped it to the right side, put it over the door and fastened the fabric on the back with a staple gun. And voila, a fabulous new headboard!
Of course you can't have a new headboard without a new duvet too. One of the reasons it has taken me so long to do this room is that I painted the walls Bittersweet Chocolate by Benjamin Moore which is very dark, but which I also love. My husband said no flower bedding, and I didn't want anything that was going to make the room look any darker, but I was having no luck finding anything in my price range that also met those requirements. I also didn't want to spend a lot of money because we have two small children and a dog that destroyed our last two duvets that I loved from Yves Delorme and Manuel Canovas. So I bought two king size white flat sheets at TJ Maxx and cut them down to fit my down comforter and piped them with the same turquoise fabric that we piped the headboard with. I'm contemplating adding some pretty gold buttons that I have, but it might be too much for this particular room. We'll see.

Either way, I love how both the headboard and the duvet came out, and both for under $100. I'm hoping to use the money I saved on two ceramic turquoise lamps that I spotted at TJ Maxx too. And while I am not so thrilled with the minimal styling and wrinkled-ness displayed in the photos here considering I have helped style many a bed for photo shoots, it would probably have taken me another 4 months to post this if I waited til I had an ironed duvet...unless of course my fabulous aunt Juanita stopped by again.

Friday, August 6, 2010

Newport Wedding

Today is my six year wedding anniversary so I thought it seemed appropriate to share a few pictures of our wedding. I LOVE weddings and so I certainly had a good time planning mine. While some people stress and stress over it, I would do it every year if I could just for the party planning aspect of it. Please pardon the picture quality as they are photos of photos. Six years ago I thought having all digital images made no sense and that I would somehow lose the quality of the images by not using film. Clearly, I'm a real forward thinker.
My husband works in the sailing industry and we live in Newport so we knew we wanted our wedding to be on or near the water. We decided to have our ceremony on an 80+ foot race boat called Carrera. My bridesmaids, parents and I boarded the boat at the Newport Shipyard and crossed Newport Harbor to Alofsin Pier at Fort Adams State Park where the groom, groomsmen and minister boarded the boat and the guests lined the pier.

As I've mentioned in previous posts I was determined to have peonies at my wedding, but because the florist wouldn't guarantee that they would look good in August we went with wide open garden roses for my bouquet (top) and centerpieces and ranunculus for the bridesmaids.

After the ceremony, the bridal party went for a cruise around the harbor to take photos. I loved that we were able to have an elegant wedding, but still be barefoot through the ceremony.
My husband and the groomsmen wore starfish boutonnieres that I made. I had been to so many weddings where the boutonnieres barely made it through the ceremony and looked limp by photo time so I knew I wanted something that we wouldn't have to worry about.
The cake was by Scrumptions and had white chocolate starfish and swiss dots. I brought them the ribbon to top the cake with to be sure it matched the other ribbon used throughout the reception.
The reception was at Eisenhower House, overlooking Narragansett Bay. I had custom fuschia silk overlays made for the tables and hung tiered paper lanterns from Pier 1 in various shades of pink and white throughout the party tent. The tent poles were wrapped in white fabric and tied with matching grosgrain ribbon and a large starfish.
The starfish topped menus were tucked into each napkin and wrapped in pink and green stripe grosgrain ribbon. Our programs were very similar, but were on popsicle sticks in case people needed to fan themselves (except that we ended up with an atypically cool day for August). My friends get a major shout out for helping me put together the 200 menus and programs the week of the wedding.
Perhaps one of the most important things that happened that day (other than marrying my fabulous hubby, of course) was that the cake company had asked Southern New England Weddings magazine to come photograph the cake. When they got there, they ended up photographing all of the decor and giving it editorial coverage on three pages in their 2005 edition.
While I've long been obsessed with home decor and party planning, getting editorial coverage for an event that I planned every last detail of myself was pretty exciting and gave me the confidence to believe that I could actually do this for a living, and inspired me to do the RISD Interior Design Certificate Program.
So hear we are six years, two kids and one house later. I still love looking at our pictures. It was such a fun day. I've been to a lot of weddings, and I have to say that the ones that are the most memorable are the ones where people really put their own personal spin on them. Believe me, my mother was having a heart attack for the eight months of planning a ceremony on a boat, but in the end, that's what people always still talk about.